Our developments
Hedgehog
The educational robotics controller Andrix, which was mainly developed during the project SCORE! (Funded by the Austrian Research Promotion Agency), was further developed in reporting period 1. It is now denoted as Hedgehog for pointing out that it is not only compatible with Android devices (which was suggested by the old name Andrix). Figure 13 shows the educational robotics controller Hedgehog.
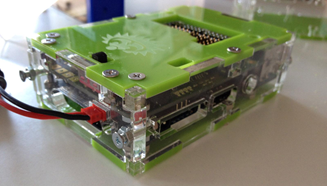
Figure 13 Final version of Hedgehog educational robotics controller
The main development within ER4STEM was concerned with Pocket Bot, a graphical programming environment for Hedgehog to be used on smartphones. The open source software app Pocket Code, which offers a graphical programming environment, was used as basis. A Pocket Code program realizes a background and different objects. Both of these can have scripts that are triggered by different events, such as the program starting, an object being tapped, or two objects colliding. Scripts are composed of sequential blocks that each accomplish a tasks. They are separated into categories such as “Control”, “Motion”, “Data”. To develop Pocket Bot as a robot extension to Pocket Code, a new category, “Hedgehog”, was added. As described earlier, there are two main elements for bringing functionality to Pocket Code: bricks and functions. These two map cleanly to actuators and sensors. The following elements were already implemented:
- a brick for setting a motor’s power,
- a brick for setting a servo’s position,
- a brick for turning a servo off,
- a function for reading digital sensor values, and
- a function for reading analog sensor values.
Pocket Code does not provide a programming interface that would allow Pocket Bot to be developed as a third party plugin to the Pocket Code app, but it uses clean separation of concerns, which makes it possible to make the necessary changes without interfering too much with the rest of the app. However, this means that Pocket Bot cannot be used as an optional part of the app: it needs to be distributed either with the official, main Pocket Code app, or as a completely independent fork. To demonstrate Pocket Bot’s functionality, a simple program was implemented that uses both Pocket Code and Hedgehog features: an object allows the user to interact with the program while it is executing, and the program controls a motor depending on the user’s input (see Figure 14). A variable is used to save the state between invocations of the “When tapped” event handler. Although the program is kept simple – which is in line with the complexity that is manageable as a graphical program – it shows how a seamless integration into Pocket Code was achieved. It also shows how a highly motivating use case of Pocket Bot can be achieved with minimal effort: a remote control for robots.
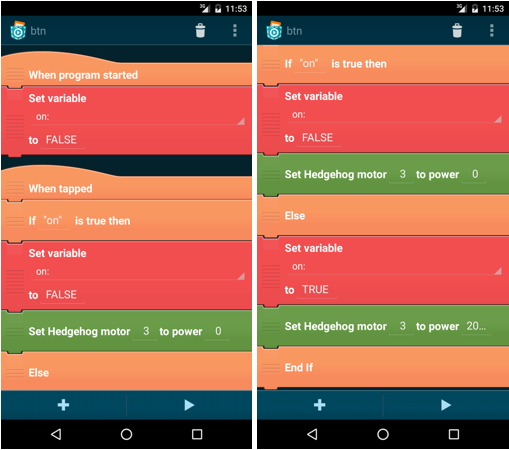
Figure 14 Pocket Bot demo programs
Pocket Bot can be used for graphically programming the controller Hedgehog. It allows the control of actuators and the reading of sensor values using according graphical blocks. Apart from Pocket Bot, also further minor technical improvements were carried out regarding the Hedgehog controller, which should ease its usage in workshops and other robotics activities.
SLurtle
Cardiff University redesigned and implemented a prototype of a secure virtual world environment with SLurtles for young people (T.5.3; D.5.2). To ensure stability during the implementation of the prototype within schools, the decision was to create a secured online environment, accessible only to the schools working with Cardiff University. Feedback from teachers prior to implementation has resulted in some minor updates to the environment. Since development of the prototype, infrastructure issues within some pilot schools have meant the unexpected additional development of a standalone virtual world. Based on SLurtles in Second Life (Girvan, Tangney and Savage, 2013), the SLurtles created for ER4STEM had to be implemented in a secured virtual world that would provide a safe environment for children and young people to use the robots and interact with each other.
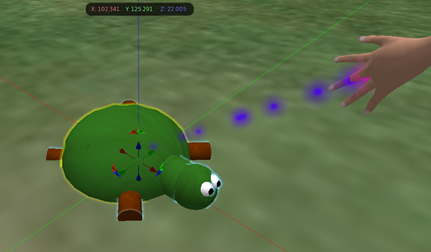
Figure 15 Avatar interacting with SLurtle for kids
Figure 15 shows the SLurtle tool created for ER4STEM. With many of the same requirements of the original SLurtle, a similar looking tool was created. The head provides a clear heading, whilst the body provides a clear indication of the position of the SLurtle. When selected (as shown in Figure 15) the precise X Y Z coordinates appear providing the precise location of the SLurtle on the grid island. The original SLurtles were provided for users from a SLurtle collection point. This showed images of the types of objects that each SLurtle would create, from which the user could select a SLurtle. Initial user test showed that whilst it was useful to see the types of blocks created by each SLurtle, requiring the user to visit this point for each SLurtle used was inconvenient. Therefore the ER4STEM SLurtles are all provided in a user’s inventory when their account is firstcreated. Each SLurtle contains a lineSegment (Figure 16). An instance of the lineSegment is created starting at the center of the SLurtle’s body when the ’pen down’ command is given. The shape, width and height of the lineSegment are predetermined. The length is determined by the distance travelled forward by the SLurtle in a single move when the ’pen down’ command is used.
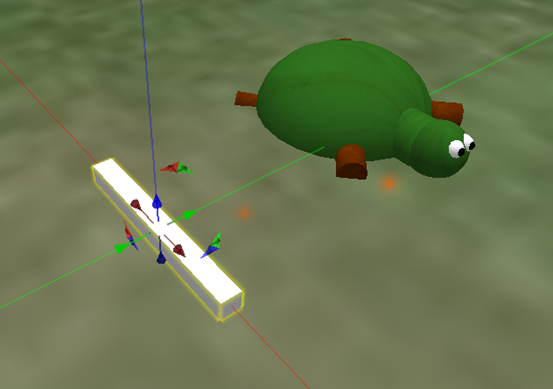
Figure 16 Instance of a 1 meter lineSegment in white
The position, colour and length of each lineSegment created is determined by a script in the SLurtle. Users have two options to achieve this. 1) Create a new script in the SLurtle and use a text editor in the virtual world to write the script. 2) Use Scratch for OpenSim (Figure 17) which provides a block-based programming environment which automatically generates the text-based script, which can be copied into a new script in the SLurtle. It is anticipated that most users will use Scratch4OpenSim but as they gain familiarity they may change the script in the virtual world text editor, providing teachers with an opportunity to develop lessons which support learners transitioning between block and text-based languages. The particular advantage for students who are collaborating or transitioning is that scripts in SLurtles can be copied into Scratch4OpenSim to be represented as graphical blocks.
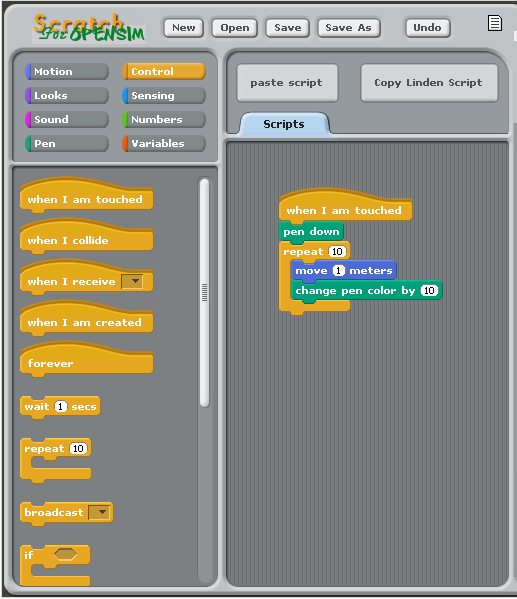
Figure 17 Scratch for OpenSim programming interface
Attributes assigned in the script placed in the SLurtle are passed to a script within each lineSegment instance. From the original SLurtles, this lineSegment script had to be adapted to operate on the OpenSim platform. OpenSim was the virtual world platform chosen for the development of SLurtles. Minecraft was considered as a popular alternative, however in order to construct the user must first mine resources which could distract from any intended learning outcomes and needlessly extend the length of activities. Using the OpenSim platform, SLurtle World was created as a secured environment for young people and their teachers to log into. Having created and avatar, upon first arrival into SLurtle World, the user appears on the heelo_world island (Figure 18). This is an orientation island for them to explore and learn how to navigate the virtual environment before going to their class island.
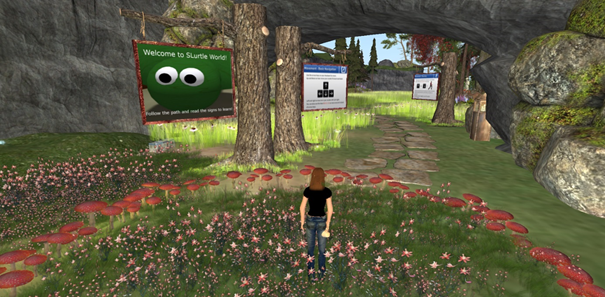
Figure 18 Arrival in SLurtle World
The class islands (Alpha, Beta and Zeta) are all identical and designed to be flexible spaces with a small arrival area which cannot be changed and a large open space when can be configured in any appropriate way for the learning activity. To facilitate this number of resources are available for teachers including a sandbox and sky platforms (Figure 19 & Figure 20).
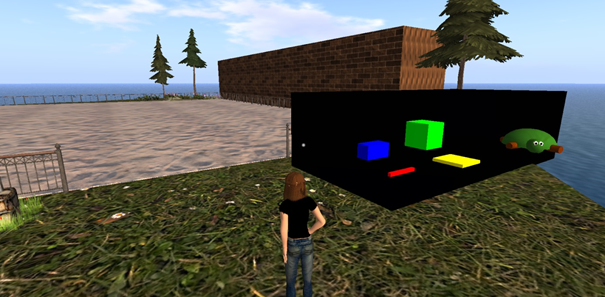
Figure 19 Sandbox with SLurtle Collection Point
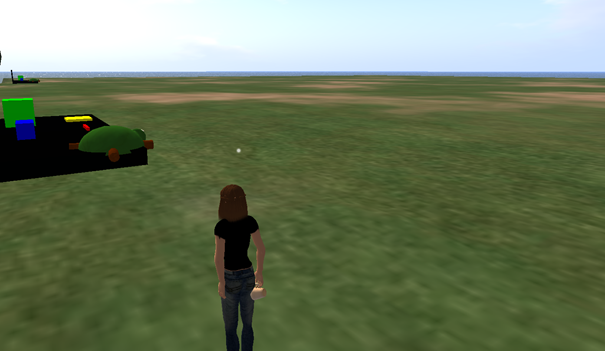
Figure 20 Open space with SLurtle Collection Point
At the SLurtle Collection Points students can choose the type of SLurtle they wish to work with and a copy of that SLurtle will go into their inventory. Each SLurtle is represented by the type of object it will create, as seen in Figure 19, four cuboids could be available. Again, within the teacher’s resources there are SLurtle Collection Points for a range of shapes.
Robotic Platforms (UoA and ESCIEE)
Esl, Tank
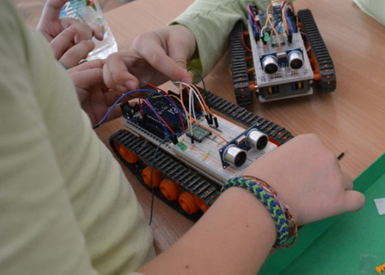
ESI CEE has developed a custom Arduino-based robotics kit. Among the advantages of the
kit is its cost-effectiveness, further supported by including easily replaceable and adaptable
standard components. The kit is specifically designed to be used safely by children - to
assemble the parts you do not need to a soldering iron or sharp tools. Compared to other
robotics platforms for young students in which the electronic components are not directly
visible (black box) the ESI CEE Arduino robotic kit uses, with some minor modifications,
original engineering elements such as Arduino Uno board or other adapted compatible microcontrollers,
ultrasonic sensors, motor drivers, LEDs and resistors. This way, young researchers are enabled
to make their first steps in electronics and robotics by experiencing technology in a way they
rarely see it - as a white box. Children assemble the robot through a visual guide, consisting
of only photos and no instruction, allowing them to learn through a constructionist pedagogical approach.
The elements in the robotics kit are connected through a breadboard using wires. Moreover,
the mechanical parts are fixed together with plastic pins which allows for them to be easily
assembled and disassembled many times. The assembled robot is a small tank that can be
controlled with either a PC using USB cable, or a Bluetooth module. Furthermore, the tank can
be programed to run autonomously through a program uploaded to the controller.
In addition to the Arduino IDE, ESI CEE adapted a program code that allowed young
students to control the robot using visual languages such as Scratch and Snap.
During the educational robotics workshops based on the kit, the students are able to
learn the basic concepts of robotics through demonstrations and games. Together, with
the support of the tutors and through visual instructions, the students assemble the
robot that they will program to perform simple tasks with visual programming software.
In order to assemble the robot, children work in groups. The workshop also includes a
creativity seminar based on the mind-mapping concept of Tony Buzan, which aims to encourage
children to discover additional practical applications of robotics in various fields of
science and in everyday life. Attaching a pen to the tank is easy and useful for the
students to learn basic mathematical concepts such as circles, angles, proportions and others.
Since the beginning of 2016, more than 500 students participated in workshops,
based on the Arduino-kit developed by ESI CEE, having rated their positive experience
with an average score of 4.9 out of 5.
The robotic kit design, as well as the corresponding educational robotics curricula,
are shared and updated in a public repository in order to be easily accessible to other
tutors and to allow them to contribute to the kit further development.
Useful links
- https://scratch.mit.edu/
- https://snap.berkeley.edu/
- https://www.arduino.cc/
- Link to GitHub
- Link to esirobot
- ESI CEE Facebook